RDS TEAM
Basic Bone Morphing
Example1 (easy understanding)
In this tutorial, we will learn how to move a character with the “Morphing by bones” we arrive at this result:
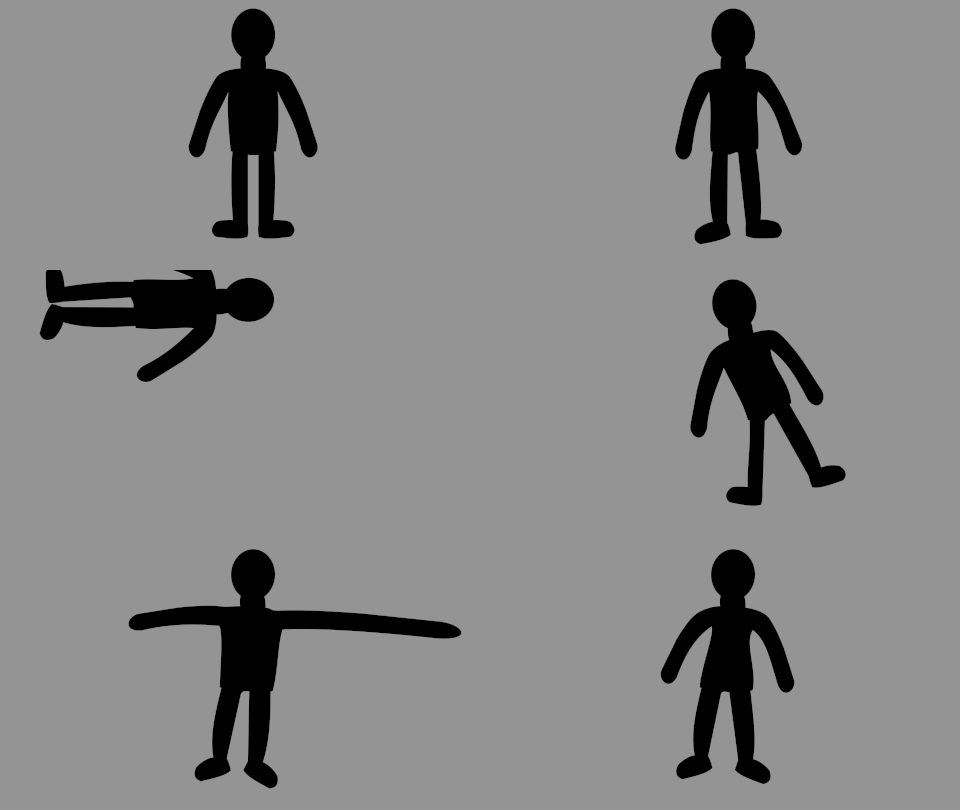
A puppet animation.
Preparation
First, we need to create a character in 1 piece, then create a skeleton in a well defined order, to avoid that everything does twist at the same time during the animation.
Once your “puppet” in the Canvas It must be added a skeleton. To add a skeleton layer, New layer → Other → Skeleton

Place the layer skeleton next to the puppet.
Here is a shema which shows the order in which you must create each bone:
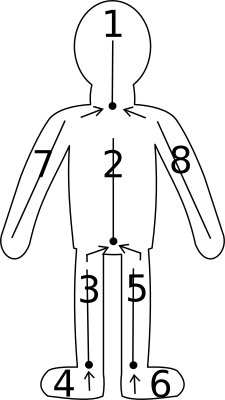
Schema numbered to place the bones.
First 1 then use the bone of 1 to create the 2 etc…
To create the 5 bone, use the 2 bone, the arrows represent what “bone” must be used to create the new “bone”. To create the 7 bone, use the bone 1, and 8 use the bone 1.
After you create the 1st bone (the head) click: Switch handles widths

Button: Switch handles widths.
This will show you the widths of handles, it remains only to completely cover your puppet with each “bone” use the “Purple handle” to change the diameter of the width.
The rest you already know the “orange/brown” allows the lengthening of the segment (bone). the “blue” handle this is for orientation (corner handle) from the origin with a determined length, “green” This is the original/axis of rotation (handle position) to move the whole bone.
Once your first “bone” covers the entire head and neck, right-click on the skeleton and Create a child bone place him then on your puppet the shema will help you have a correct order (for the animation then).
Once finished and that your puppet is covered with bones, you have this:
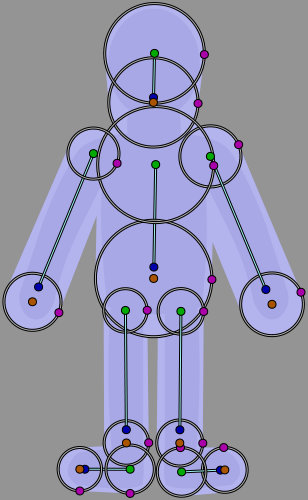
Puppet covered with bones.
Linking bones to members
Then select your puppet, in the Layers panel and then make a Ctrl|A in the canvas to select all vertices.
Then selected the layer skeleton We have create earlier, making Ctrl|Clic, in the layers panel. In the canvas now right-click on one of the handles of the skeleton and make Link to the skeleton.
You just have to create your animation.
Project file
The zip file containing parts of this tutorial may be found here: Skeleton-puppet
See also
Here’s a video using the same technique on a character dispute: Development: Bones (part7)
Example 2 (more detailed understanding)
Now that you know:
The button “Toggle the width handles.”
The order of “creation of bones”.
The Handles.
Linked, a bone to a limb.
We will do it on a more complex man, the method being simpler because we designate “each limb” in “linking the bone to the skeleton” gradually as (1 to 1), and we verify that the link is made.
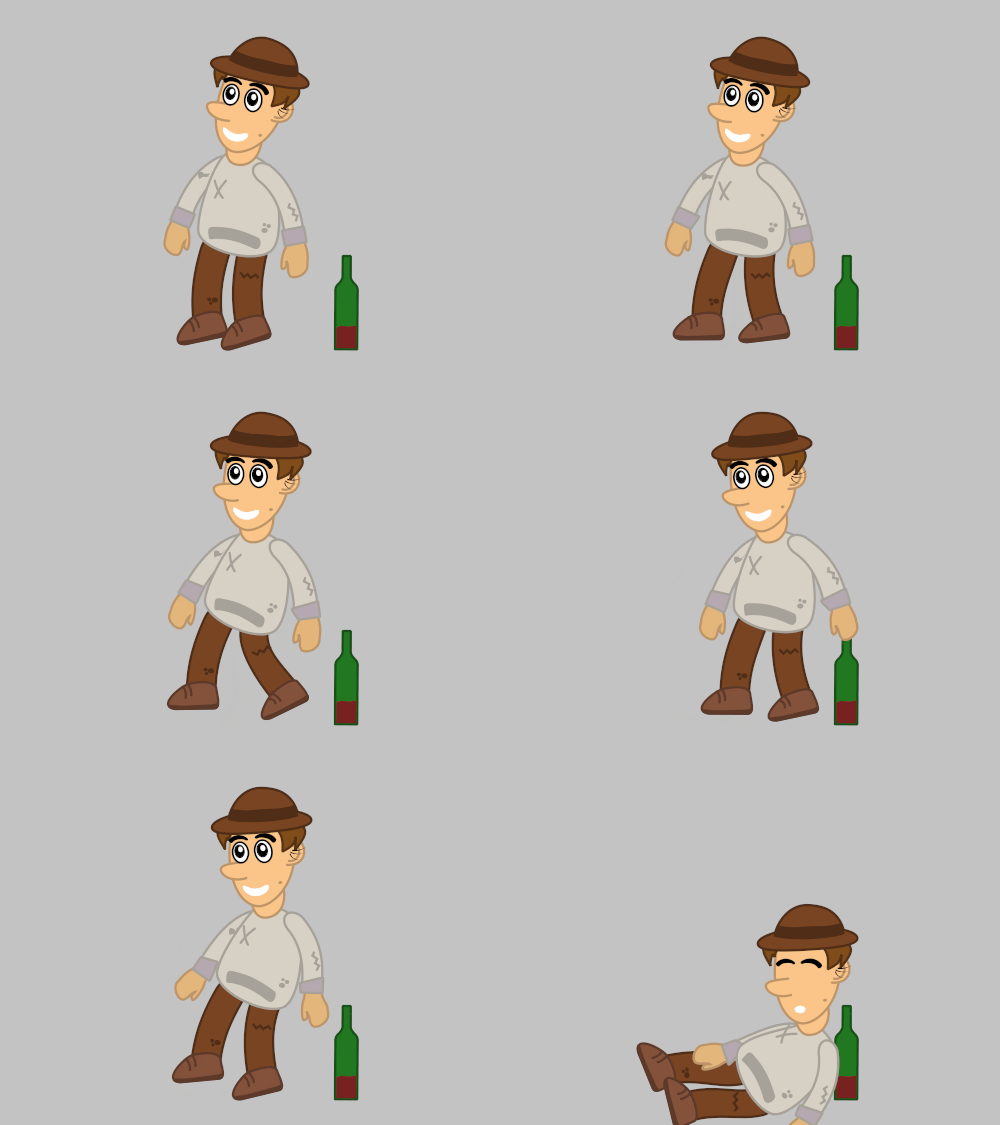
Here is our man once animated.
Let’s start by seeing which limbs should be grouped, as in this image:
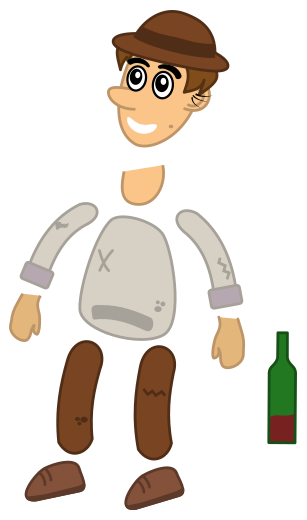
Limbs are separated.
Then import your limbs, group layers, like this:
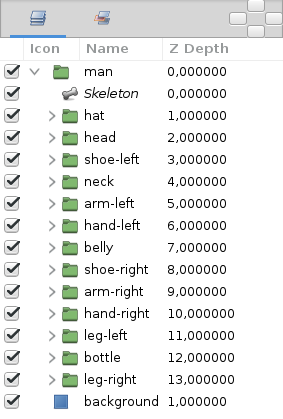
Arrange layers by group.
Once properly classified, this will go very fast, let’s do it again as we saw on the “black man”, but the only difference so, is that we will link to the skeleton each limb and check that it works before moving to the next.
As we already know the method, this will be very simple. Add a skeleton and place it at the top of our group, after positioning it on the head and the hat.
Then click on the group “head” in the “Layers panel” right click and “Select All Layers Kids” we must also select our “hat” here we will make rather a Ctrl|click once the layers of “hat and head” to select, let’s move on.
Ctrl|A (to select the vertices) selecting in the “Layers panel” the skeleton. In the “canvas” now right click on one of the skeleton handles and do “Link to the Skeleton”. (You see that the color of the handles changes) this means that the link is created.
To check our link, select only the skeleton, and move the “blue handle”, the head and hat should come with your skeleton.
Well now you have to cancel, make a Ctrl|Z or “edition > cancel”, (Don’t press too many times otherwise your connection to the skeleton will have to be started again).
Now, you just do the same thing to, for all other members 1 by 1.
Let’s repeat it one last time for the “neck”.
First we need to extend “bone” so in the canvas we make a right click and “Create a Child Bone” positionner-le pour prendre le cou.
Click on the group “neck” in the “Layers panel” right click and “Select All Layers Kids” Ctrl|A (to select the vertices) selecting in the “Layers panel” the skeleton. In the “canvas” now make a right-click on one of the handles of the skeleton in the “neck” and made “Link to the Skeleton”. (you can see that the color of the handles changes) this means that the link is created.
We check the link “nake” and also “head”, (if a part of the vertices twists oddly, replace the bone and repeat the binding, if it is really impossible to correct, must then be “Link to the bone”). After checking that it works, we cancel, with the shortcut, or yellow arrow (cancel), green arrow (redo).
Then you just have to do everything else helping you with the scheme of the “black man”.
Once the “bone” add and “Bind to the skeleton or Bind to the bone” you will have something like this:
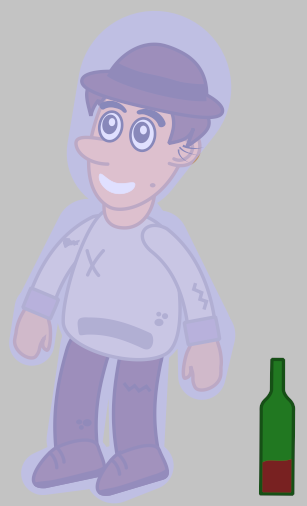
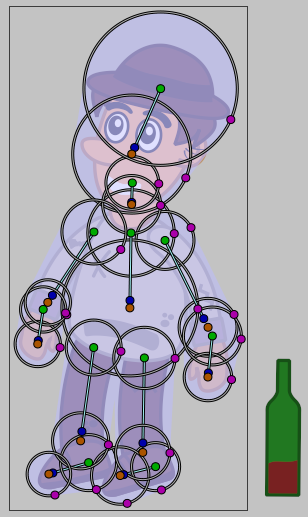
All you have to do is animate your man.
“Linked to the skeleton” OR “linked to the bone”
On the left image, you see a link made on: “Linked to the skeleton”, the limb will twist according to where it will be on your man.
On the right image, you see a link made on: “linked to the bone”, the limb will remain straight as a piece of wood.
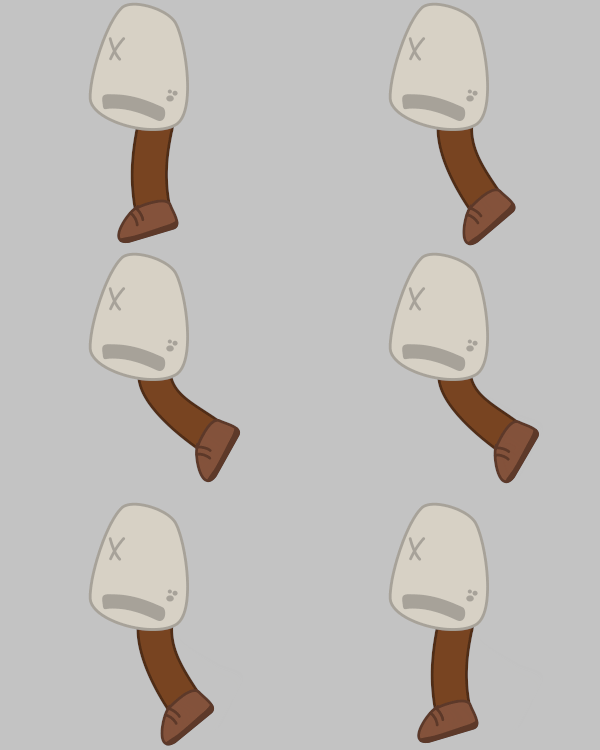

A cartoon character, will appear more alive with a few “Links to the skeleton”. So use the one that best fits the end use.
Important
Significant accuracy on the binding of a limb.
Example for a leg that is composed of 3 parts:
Create a bone for the foot, link, check. For the calf, link, check. For the thigh, link, check. (They are all to be done separately).
Project File
The zip file containing the parts of this tutorial can be found here: Man-vagabon-archive.zipz
Example 3 - Skeleton for Walking
Here is a schema of “skeleton” that was made to “walk”, this skeleton was built especially for this function.
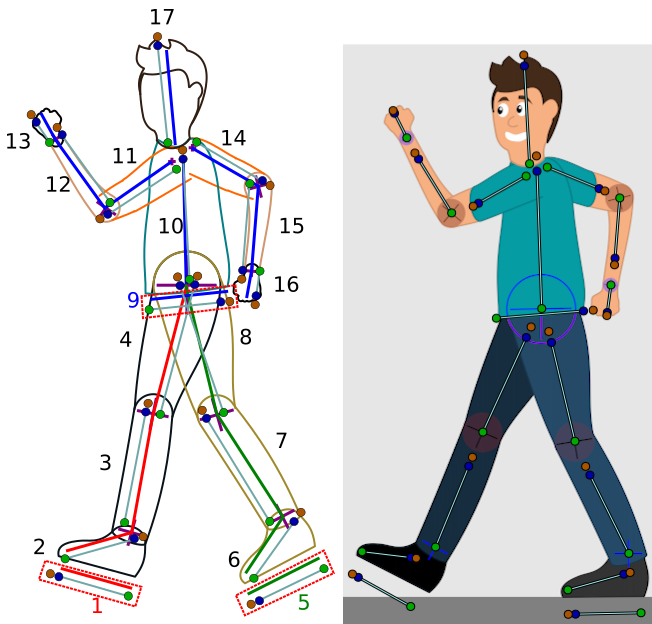
Schema for walking.
There are 3 skeletons, that of the left leg, right leg, trunk.
A “hook” is a primary bone that prevents the skeleton from sliding unintentionally during animation.
Here the 3 hooks are located at the position 1,5,9 there are dotted.
To start creating our skeleton it is necessary, create the bone “1”, it will be the hook, then create a child bone, move it to “2”, then continue until 4.
As for the 2nd skeleton, place the “hook” bone “5”, place your bone in the same direction that the limb.
Here the shoe has the same angle that “bone”.
We pass to the skeleton 3, we create the bone “9” which will be the “hook”, then once the bone 10 is placed, we create the child bone 11 until the 13th, we create the child bone 14 from the 10th until the 16th.
And we end up creating the child bone 17 from the 10th.
To summarize the bone 10, is the bone that must be selected to create the child bones 11,14,17.
The advantage of this skeleton is that the feet will not slip “unintentionally” during the animation, this is why it is better to use this type of skeleton if you want to move the lower body.
Project File
The zip file containing the parts of this tutorial can be found here: Skeleton-to-walk-archive.zip
Example 4 - Skeleton general (default)
Here is the schema of a general “skeleton” that at the moment is the best if you want to do something other than walk, so there is only 1 skeleton.
The only difference with the “schema of the black man” and that he can move the head and that the center of gravity is in the bone “1” green handle.
The main disadvantage is at the level of the feet, having no hook in this place, the feet will certainly move during the animation.
If you want to do a specific action, then it will be easier to create a skeleton adapted to the desired action.
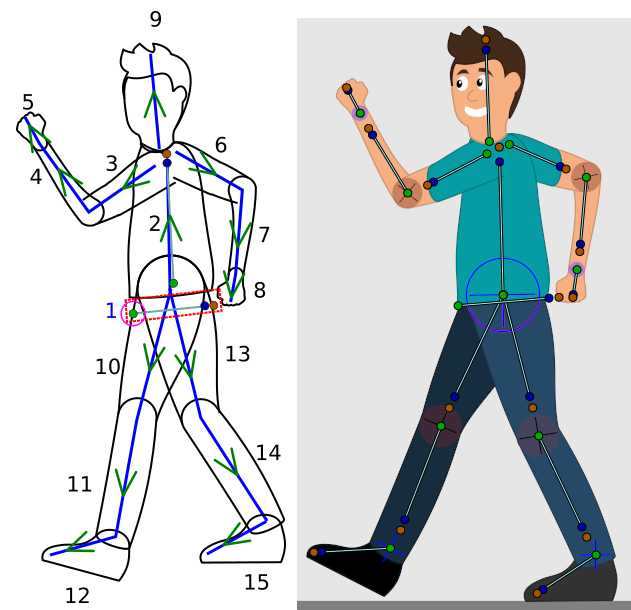
Schema of a basic skeleton.
There is only 1 skeleton, including 1 “hook” it starts to bone “1”, the green position handle, which is surrounded by pink is the handle that is to use to move the whole character.
Then we create only “bones children”: we must use the schema to create the bones in the right direction.





0 Comments